40 create labels using mail merge
Video: Create labels with a mail merge in Word Once your mailing addresses are set up in an Excel spreadsheet (see the previous video to learn how), it's a snap to get Word to create mailing labels from them. Create your address labels. In Word, click Mailings > Start Mail Merge > Step-by-Step Mail Merge Wizard to start the mail merge wizard. Creating labels in mail merge - Microsoft Community In the meantime, you may refer to the following support articles for steps on how to create and print labels using mail merge. Make sure to check out the Prepare the worksheet data in Excel for the mail merge section. Create and print mailing labels for an address list in Excel. Create and print labels using mail merge.
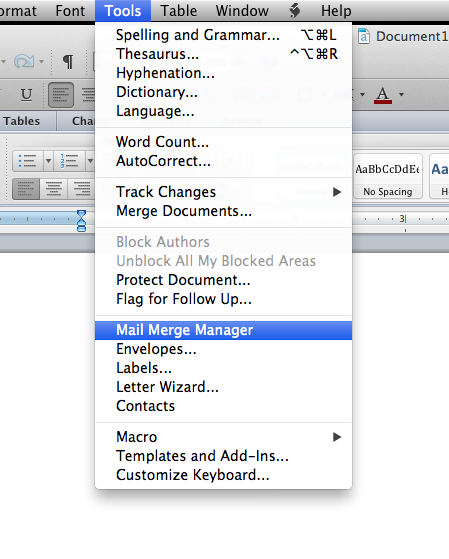
Create Custom Labels with Mail Merge: Microsoft Word In this video, I will teach you how to create custom labels in Microsoft Word using the Mail Merge feature. Mail Merge is one of the rarely understood featur...

Create labels using mail merge
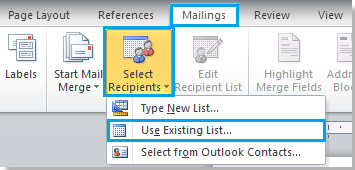
Create labels with different addresses in Publisher Print the labels Click Finish & Merge > Merge to Printer. Under Settings, make sure Publisher says Multiple pages per sheet. Click Print. Save the label setup for later use After you complete the merge, save the label file so you can use it again. Click File > Save As. Click where you want to save the label file, and then click Browse. Create and print labels using mail merge - Sibanye-Stillwater Step 2: Prepare the main document for the labels In Word, choose File > New > Blank Document. On the Mailings tab, in the Start Mail Merge group, choose Start Mail Merge > Labels. In the Label Options dialog box, under Label Information, choose your label supplier in the Label vendors list. How to Create Mail-Merged Labels in Word 2013 - dummies Choose Mailings→Select Recipients→Use an Existing List. The Select Data Source dialog box opens. Navigate to the folder containing you data files for mail merges. Select your data file and click Open. The Select Table dialog box opens, prompting you to choose which worksheet you'll use for the data source. In the Select Table dialog box ...
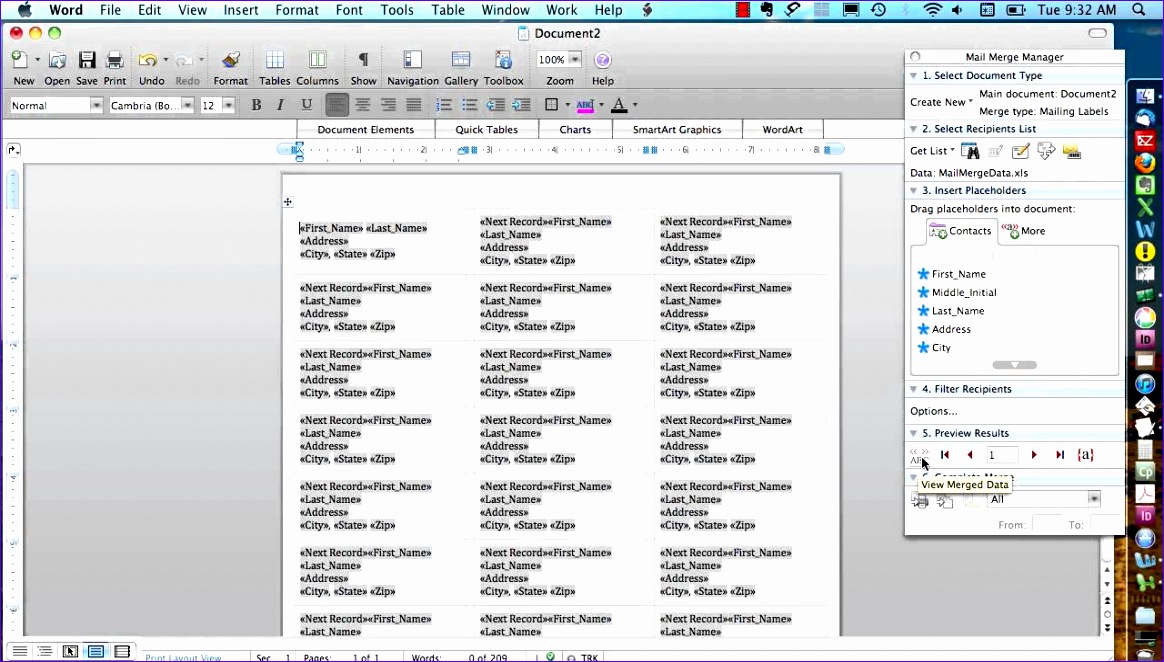
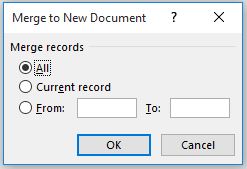
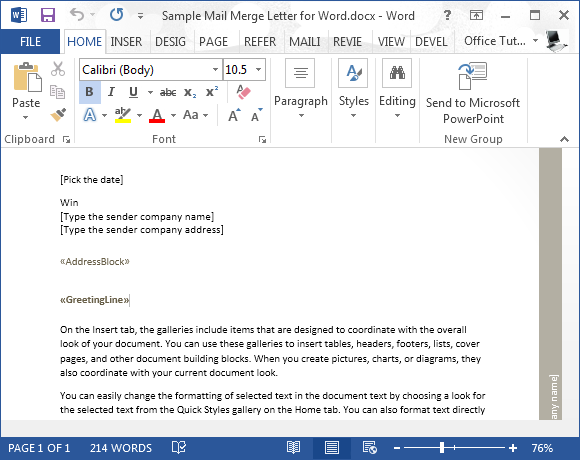
Create labels using mail merge. Use mail merge for bulk email, letters, labels, and envelopes Create and print sheets of mailing labels Directory that lists a batch of information for each item in your data source. Use it to print out your contact list, or to list groups of information, like all of the students in each class. This type of document is also called a catalog merge. Create a directory of names, addresses, and other information Print labels or envelopes using mail merge with an Excel ... Print labels. Creating labels with mail merge is a four-step process: set up a document to match your labels, connect to your spreadsheet, format the merge fields, and then print your labels. Step 1: Set up a document to match your labels. On the Mailings tab, click Start Mail Merge > Labels. How to Use Mail Merge to Create Mailing Labels in Word Oct 24, 2016 · Click Next: Complete the merge Perform the merge In the Mail Merge task pane, verify that the Complete the merge step is displayed. 6. To merge on the screen, click Edit individual labels. The Merge to new document dialog box appears, so that you can select which records to merge. Select All and Click OK to merge the labels. How to Create and Print Labels in Word Using Mail Merge and Excel ... To run the mail merge and create a new merged label document: In the the main document in Word, click the Mailings tab in the Ribbon and then click Finish & Merge in the Finish group. A drop-down menu appears. Click Edit Individual Documents. A dialog box appears. Click Current Record or enter a selected range if necessary. Click OK.
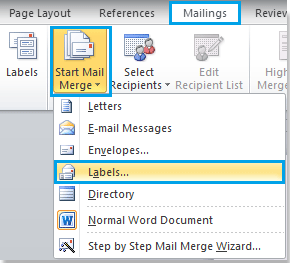
How to Create a Label-Based Mail Merge Template in Microsoft Word Follow these steps to create a Microsoft Word labels template for use in Wealthbox Mail Merge: Open a blank document in Microsoft Word Select the "Mailings" Tab Once on the tab, please select "Start Mail Merge > Labels". Then select the size appropriate for your labels and click "OK" Click on the "Select Recipients > Type New List" 5. How to Make Mailing Labels from Excel by Using Mail Merge Find your Excel spreadsheet from Step #1 and click Open . 8. Review the data and click Ok. Click Next: Arrange your labels. 9. Move your cursor to the first label and click Address block. Select your preferred formatting (using the preview pane). 10. How to Create Labels With a Mail Merge in Word 2019 Go to Mailings > Start Mail Merge > Labels. In the Label Options dialog box, choose your label supplier in the Label products list. In the Product number list, choose the product number on your package of labels. Tip: If none of the options match your labels, choose New Label, enter your label's information, and give it a name. The 7 Best Mail Merge Add-Ons for Google Docs Once happy with your settings, hit the Merge button, and the app does the rest. It's not that much different from using mail merge in Word. Download: Mail Merge (Subscription required, free trial available) 2. Avery Mail Merge. Quicklution also offers Avery Mail Merge specifically for creating labels.
Creating Address Labels Using Mail Merge in Office 365 Creating Address Labels efficiently using Mail Merge 1. Launch Mail Merge from Word 2. Start a Document 3. Select your Recipients 4. Arrange your Labels 5. Preview your Labels 6. Complete the Merge Final Thoughts Frequently Asked Questions Now, if you're working on a tight budget or want to lower costs, a DIY approach may be ideal. How to create an E-mail Merge using Microsoft Outlook 1. Open up Word 2010. Create a new e-mail message in Word. Now you are ready to begin the merge by selecting the “Mailings” tab in the ribbon. 2. In the “Start Mail Merge” grouping, click on the “Start Mail Merge” button. It will show a list of mail merge options available. You can choose Letters, E-Mail Messages, Envelopes, Labels or How to Mail Merge Address Labels Using Excel and Word Open Word and go to "Tools/Letters" and "Mailings/Mail Merge". If the Task Pane is not open on the right side of the screen, go to View/Task Pane and click on it. The Task Pane should appear. 4 Fill the Labels radio button In the Task Pane. 5 Click on Label Options and choose the label you are using from the list. Click OK once you have chosen. 6 How to Make and Print Labels from Excel with Mail Merge How to mail merge labels from Excel. Open the "Mailings" tab of the Word ribbon and select "Start Mail Merge > Labels…". The mail merge feature will allow you to easily create labels and ...
10 Excel Mail Merge Template - Excel Templates
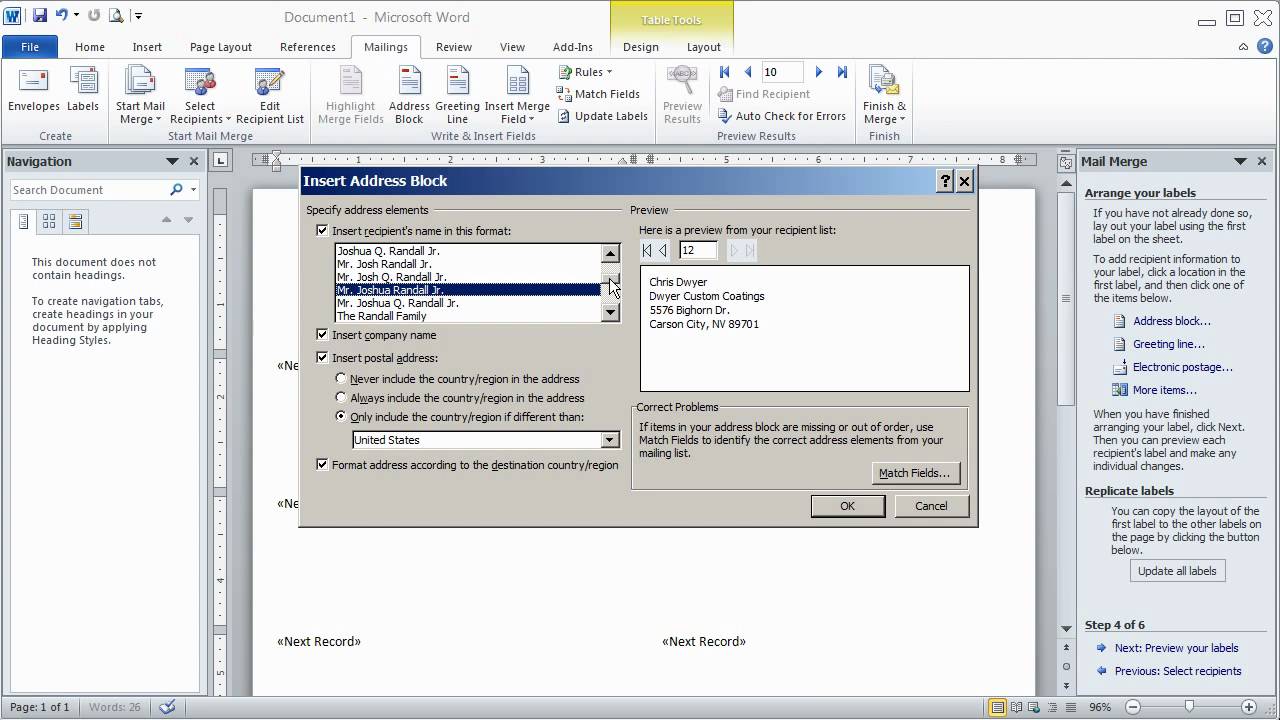
Create Labels Using Mail Merge - Intero Real Estate Create Labels Using Mail Merge In Word, choose File > New > Blank Document. On the Mailings tab, in the Start Mail Merge group, choose Start Mail Merge > Labels. In the Label Options dialog box, under Label Information, choose your label supplier in the Label vendors list.

Create and print labels using mail merge - Word
Create Letters or Labels using Mail Merge Wizard Go to the Mailings tab. Click on Start Mail Merge, then Step by Step Mail Merge Wizard. Step 1: Select document type. Select the document type (Letters, Labels) Click Next: Starting document. Step 2: Starting document. If you're creating Letters select Use the current document. If you're creating Labels, click Label Options.
How to Mail Merge using Microsoft Excel and Word - YouTube
How to Create Mailing Labels in Word from an Excel List Step Two: Set Up Labels in Word Open up a blank Word document. Next, head over to the "Mailings" tab and select "Start Mail Merge." In the drop-down menu that appears, select "Labels." The "Label Options" window will appear. Here, you can select your label brand and product number. Once finished, click "OK."

Printable Place Cards | Printable Table Place Cards
How to Create Mail Merge Labels in Word 2003-2019 & Office 365 Click "Start Mail Merge." Select "Step by Step Mail Merge Wizard." Ensure "Change document layout" is selected and click "Next: Select recipients." Choose "Avery US Letter" from the second dropdown list and find the comparable Avery® product number from our cross-reference chart or choose "New Label" to manually enter the label specs.
32 Mailing Label Mail Merge - Labels Database 2020
How to mail merge and print labels in Microsoft Word May 04, 2019 · Before labels can be made, the names and addresses must be stored in a CSV file or another format that can be imported using Mail Merge. For help creating a CSV file, see: How to create a CSV file. Once a CSV file is prepared, the steps below can be followed to create labels using a mail merge.

mail merge labels fig 1 tuxlabel - Top Label Maker
Creating a Mail Merge to Labels in Microsoft Outlook This opens the Label option dialog, where you choose your label style. Click OK after selecting your label style to return to the MailMerge helper dialog. Click Close and Word loads the template for your selected label type. Enter the merge fields you need for your labels, using the Insert Fields buttons or Step 4 of the Mail Merge task pane.
Mail Merge Labels in Word - Onsite Software Training from Versitas
How to Create LABELS in Microsoft Word Using Mail Merge - YouTube Whether you're mailing holiday cards or sending invitations to a wedding, you need a way to easily create mailing labels. Microsoft Word makes this easy to ...

Creating Mailing Labels Using The Mail Merge Helper In MS Word 2003 - Library & ITS Wiki
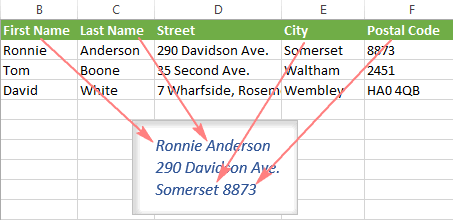
Mail merge using an Excel spreadsheet - support.microsoft.com Edit your mailing list Choose Edit Recipient List. In Mail Merge Recipients, clear the check box next to the name of any person who you don't want to receive your mailing. Note: You also can sort or filter the list to make it easier to find names and addresses. For more info, see Sort the data for a mail merge or Filter the data for a mail merge.
32 Mail Merge Label Printing - Labels 2021
Mail Merge Guide - Online Labels® Mail merge (or data merge) is the process of inserting a set of data using placeholders. It's commonly used in the introduction field of emails and documents. For labels, it's popular for creating name tags and address labels.

Update Labels not working in Mail Merge
How to mail merge and print labels from Excel - Ablebits When arranging the labels layout, place the cursor where you want to add a merge field. On the Mail Merge pane, click the More items… link. (Or click the Insert Merge Field button on the Mailings tab, in the Write & Insert Fields group). In the Insert Merge Field dialog, select the desired field and click Insert.
35 Mailing Label Mail Merge - Best Labels Ideas 2020
How to create mailing labels by using mail merge in Word? If you want to create labels which include the information about name, company and telephone number for the co-partners, you can quickly do it by using mail merge function in Word. Recommended Productivity Tools for Word More Than 100 Powerful Advanced Features for Word, Save 50% Of Your Time. Free Download

Automate Office With Mail Merge to Create Professional Address Labels, Name Badges, and More
How to Create Mail-Merged Labels in Word 2013 - dummies Choose Mailings→Select Recipients→Use an Existing List. The Select Data Source dialog box opens. Navigate to the folder containing you data files for mail merges. Select your data file and click Open. The Select Table dialog box opens, prompting you to choose which worksheet you'll use for the data source. In the Select Table dialog box ...

How to Create Mail Merge Labels in Word 2010
Create and print labels using mail merge - Sibanye-Stillwater Step 2: Prepare the main document for the labels In Word, choose File > New > Blank Document. On the Mailings tab, in the Start Mail Merge group, choose Start Mail Merge > Labels. In the Label Options dialog box, under Label Information, choose your label supplier in the Label vendors list.

33 Mail Merge Label - Labels For Your Ideas
Create labels with different addresses in Publisher Print the labels Click Finish & Merge > Merge to Printer. Under Settings, make sure Publisher says Multiple pages per sheet. Click Print. Save the label setup for later use After you complete the merge, save the label file so you can use it again. Click File > Save As. Click where you want to save the label file, and then click Browse.
Sample Mail Merge Letter For Word
How to create mailing labels by using mail merge in Word?
How to make labels from Excel using Mail Merge
Post a Comment for "40 create labels using mail merge"